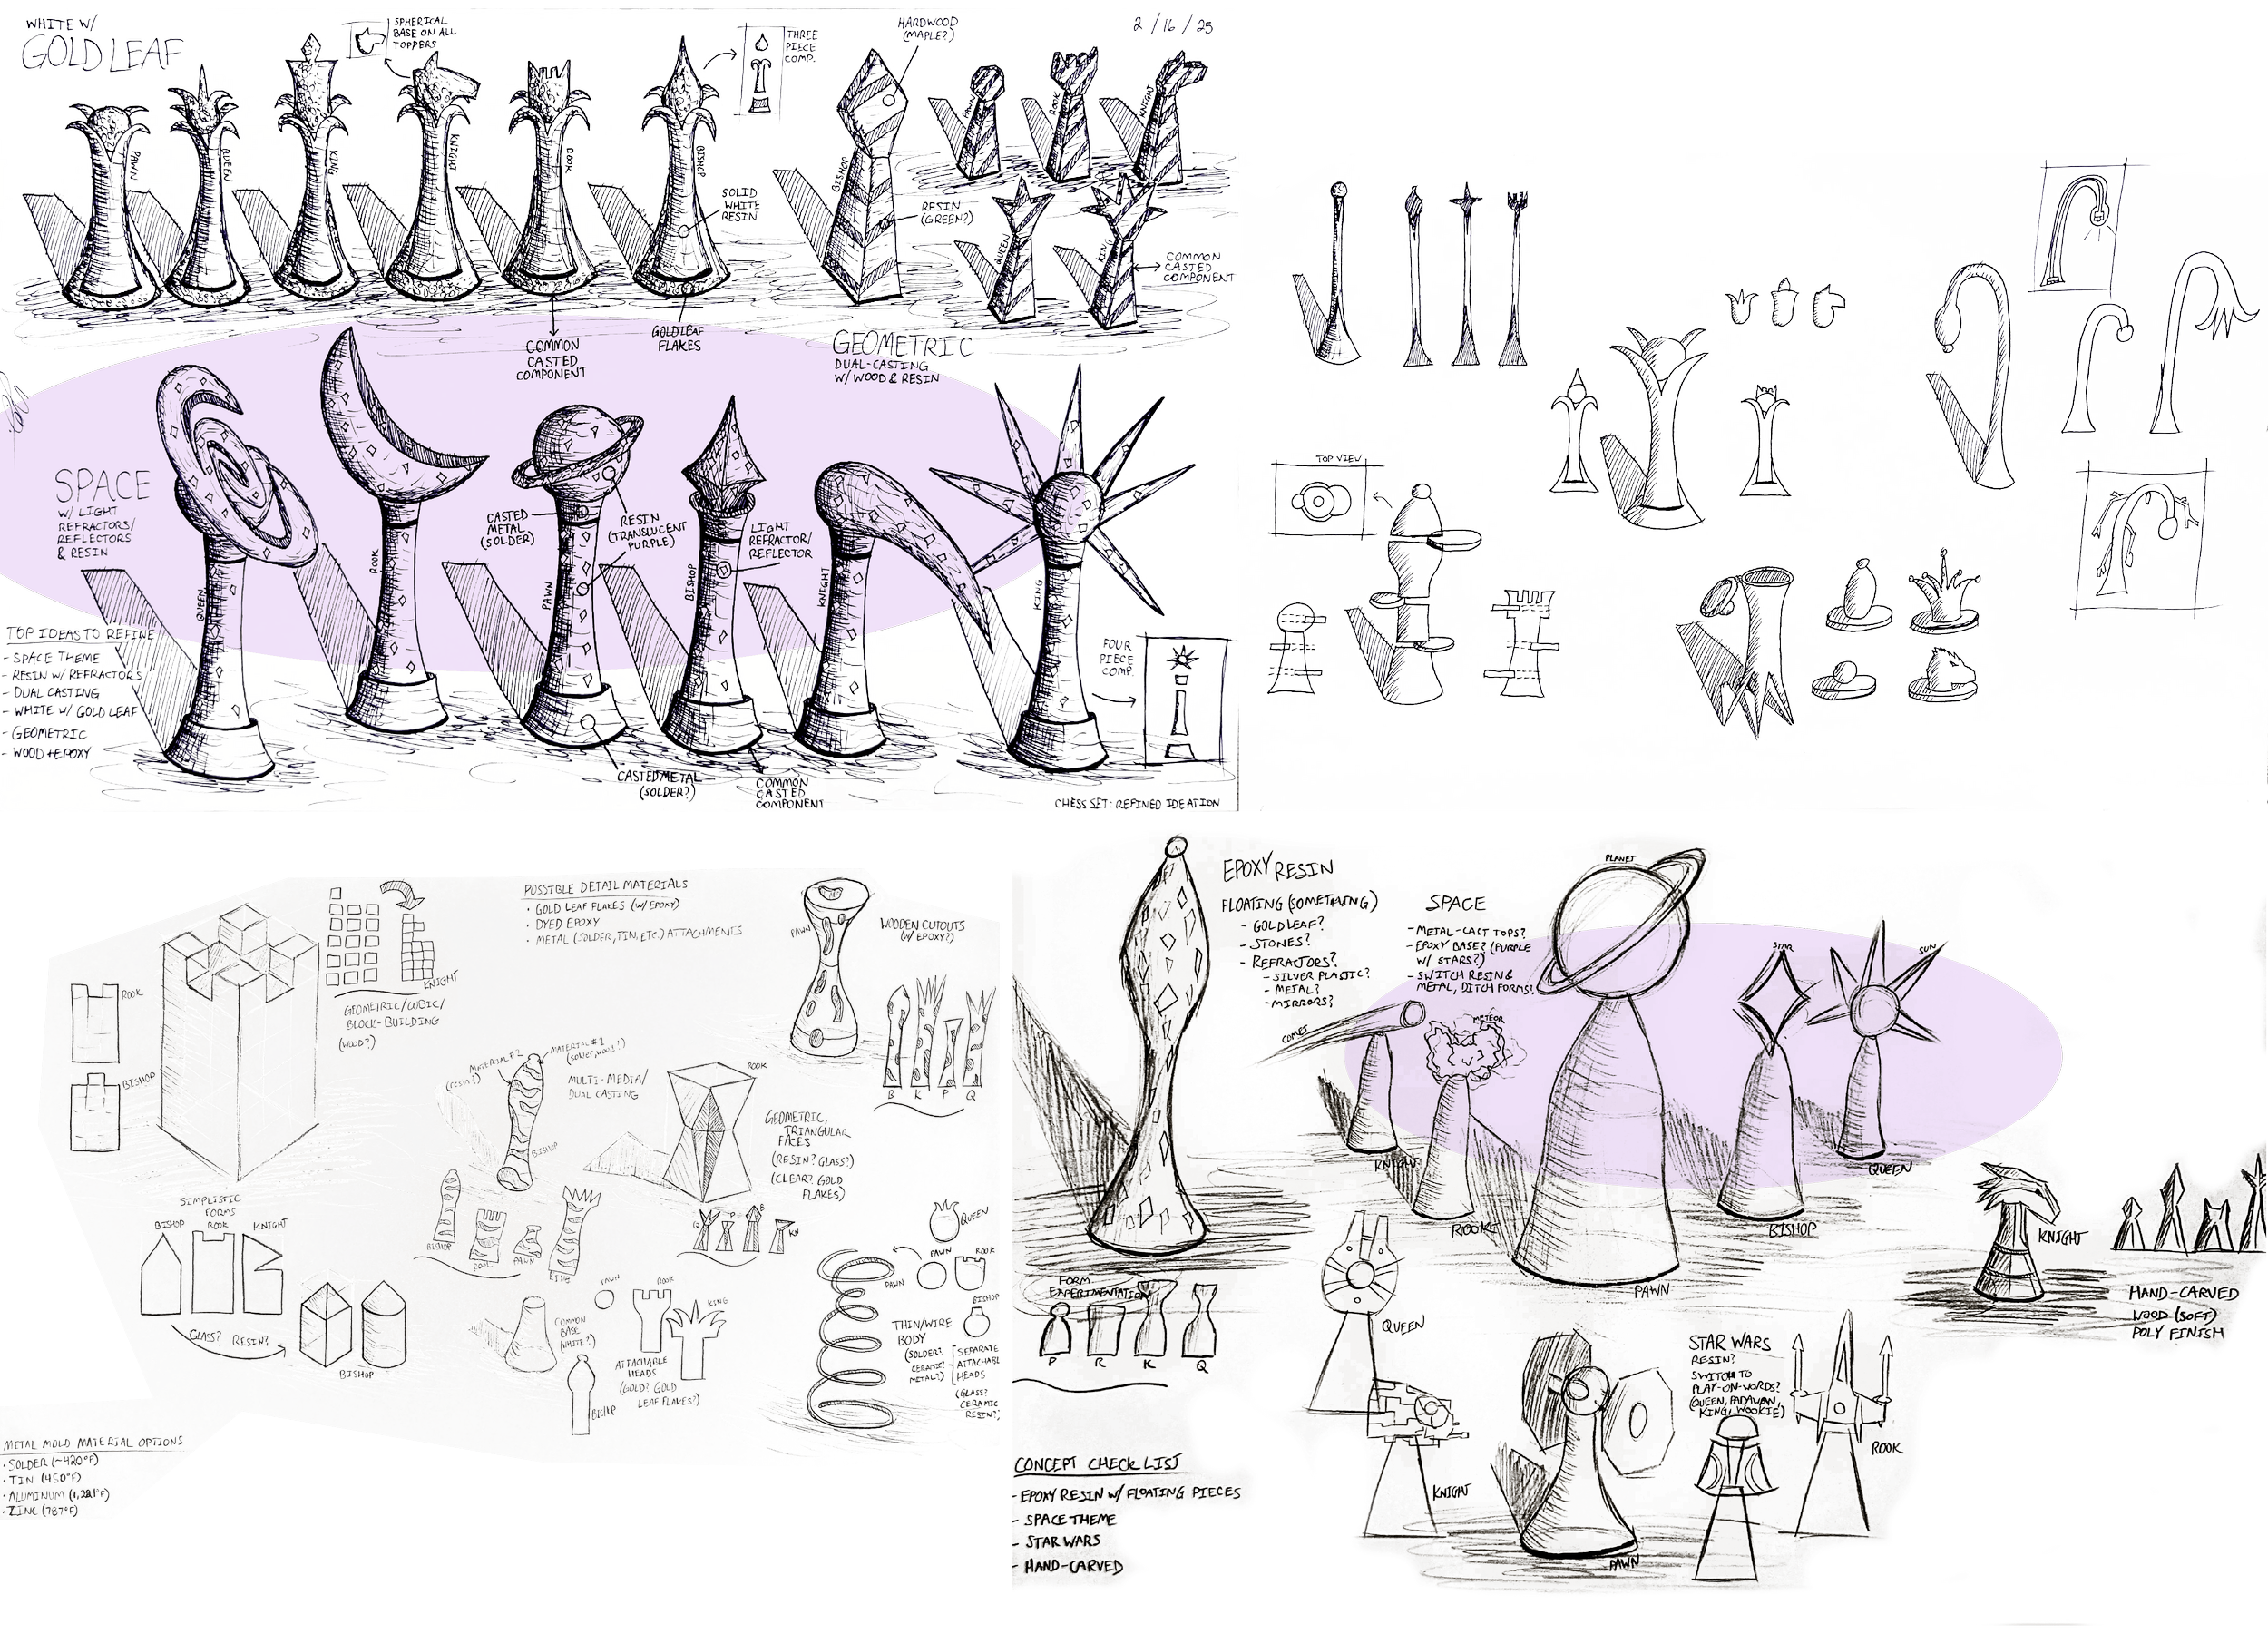
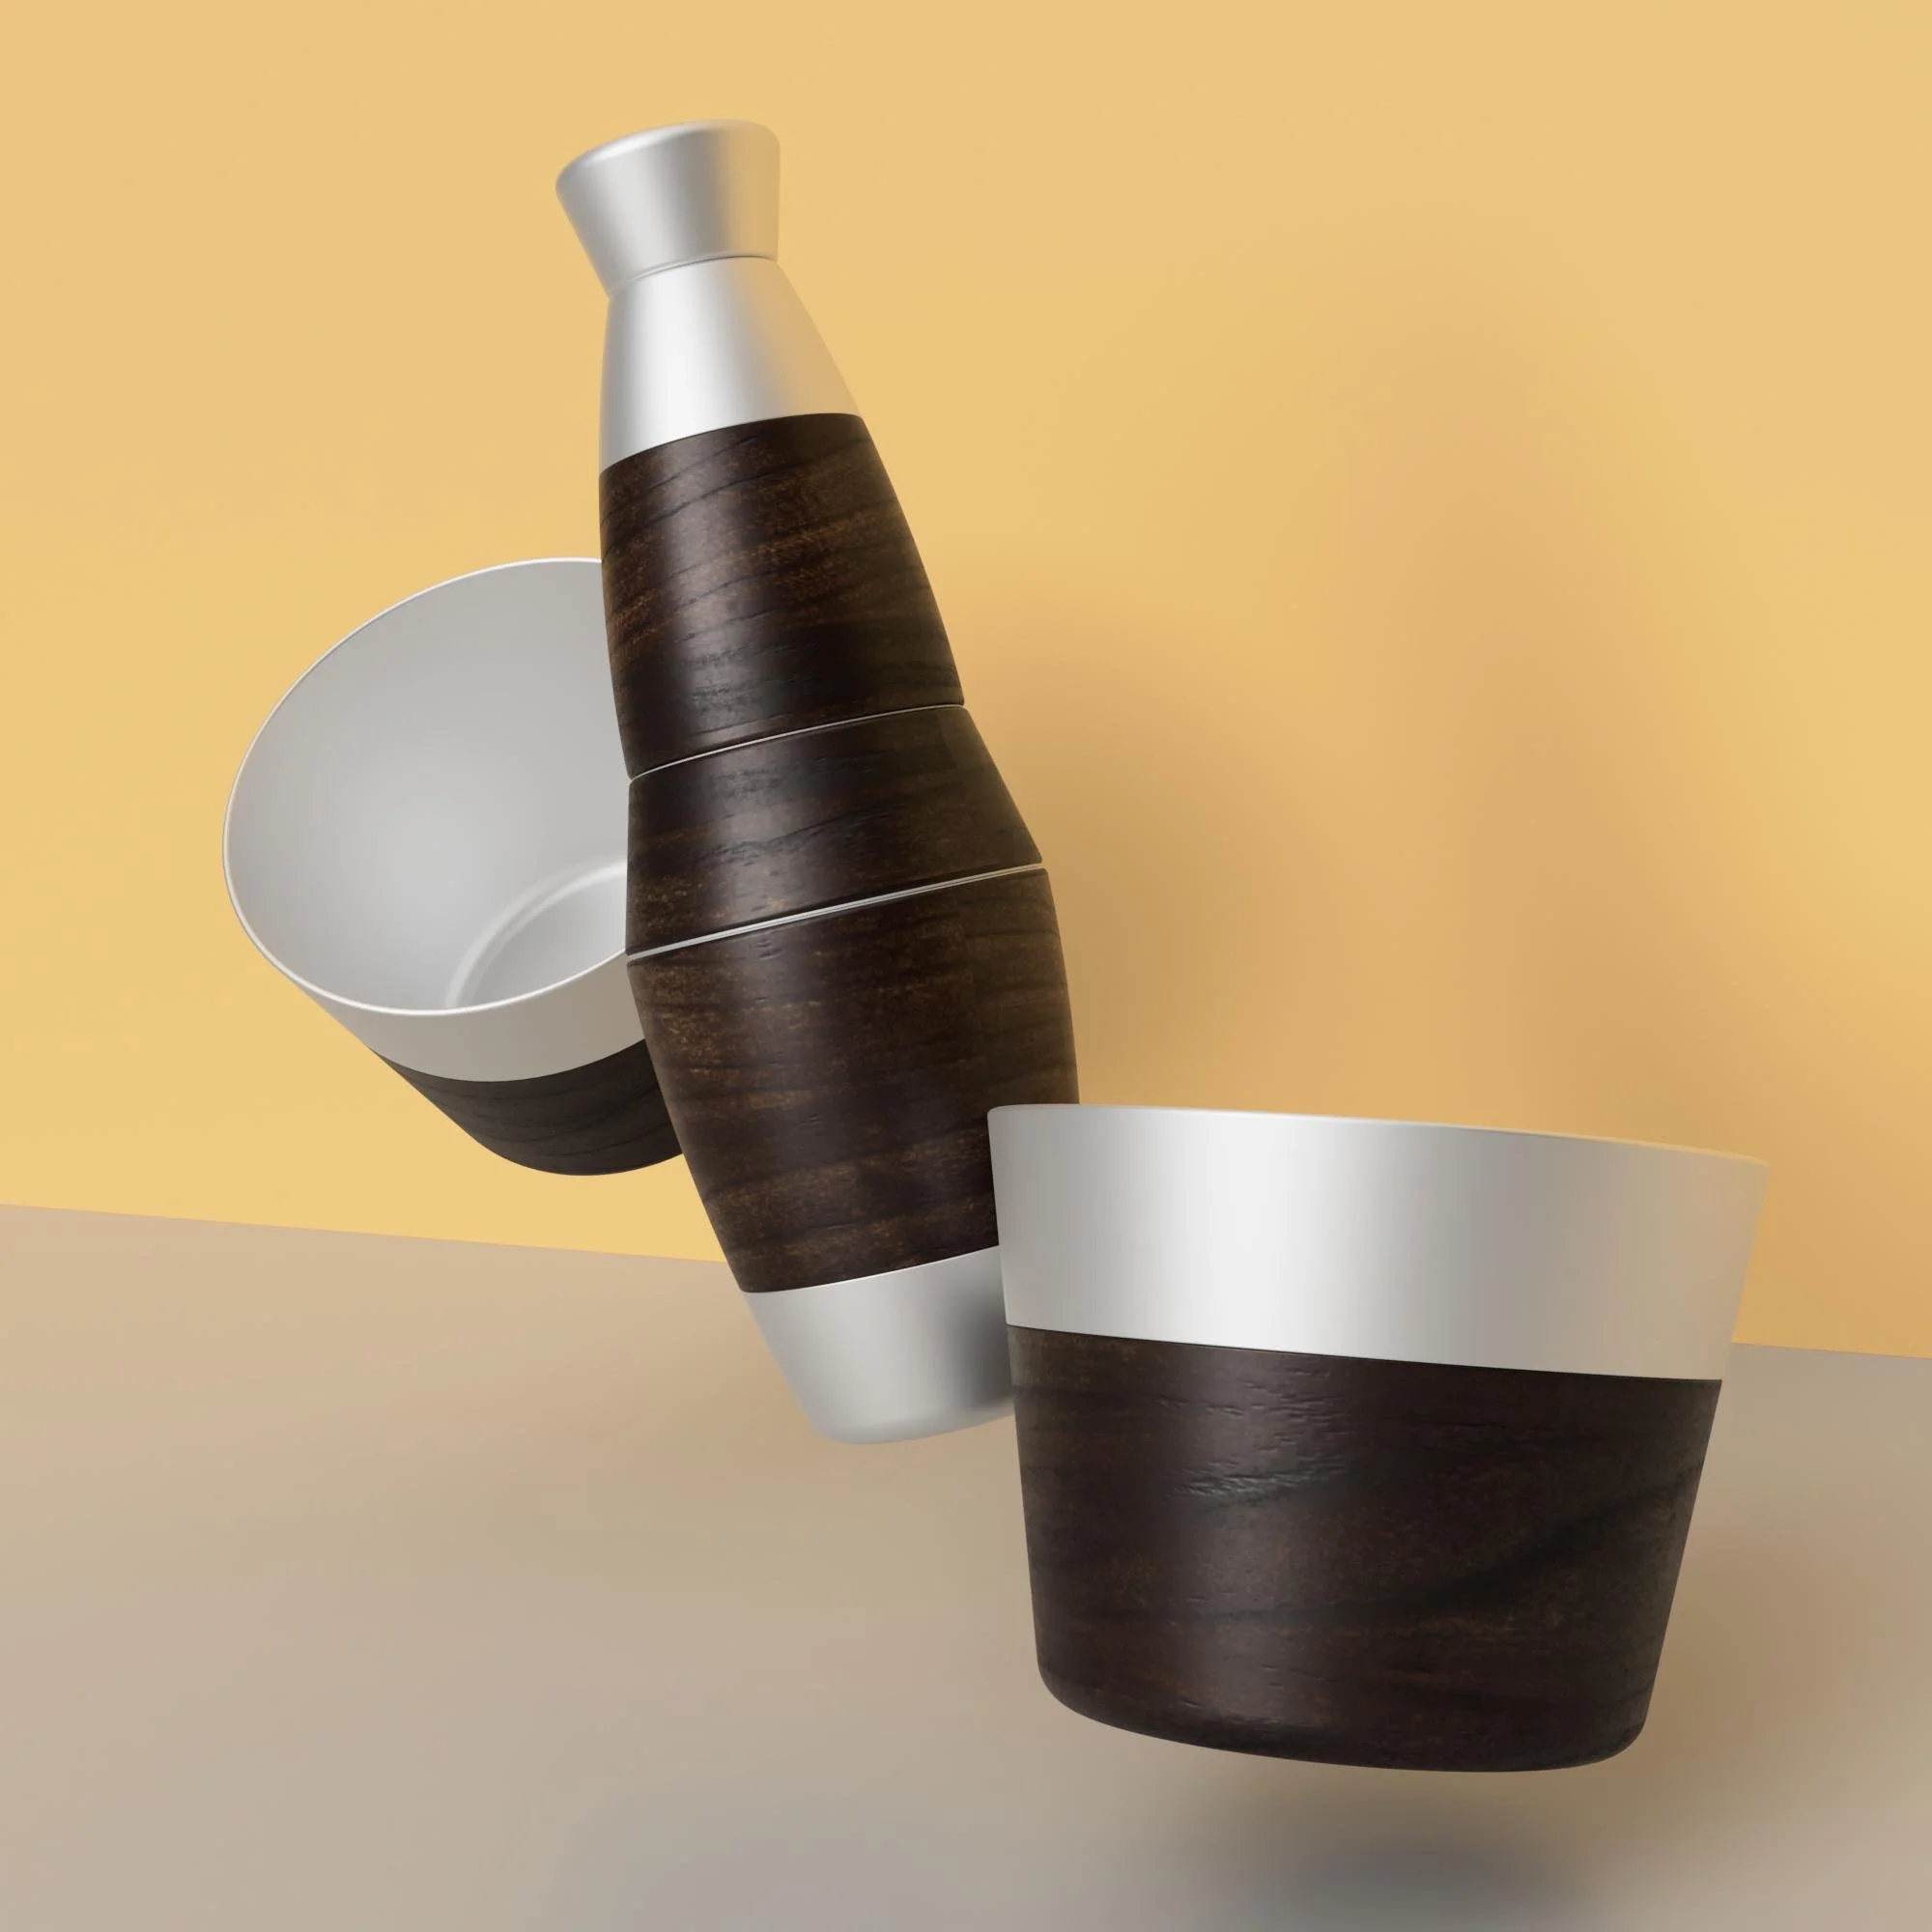
Chess Set
February-March 2025
Duration: 5 weeks
Project Description:
Create six chess pieces, one of each standard piece. They must be a family of form and contain at least one common casted component.
Materials: Bismuth, epoxy, mica powder
Molten bismuth injuries: 1
Stovetops ruined: 1
IDEATION
MATERIAL EXPLORATION


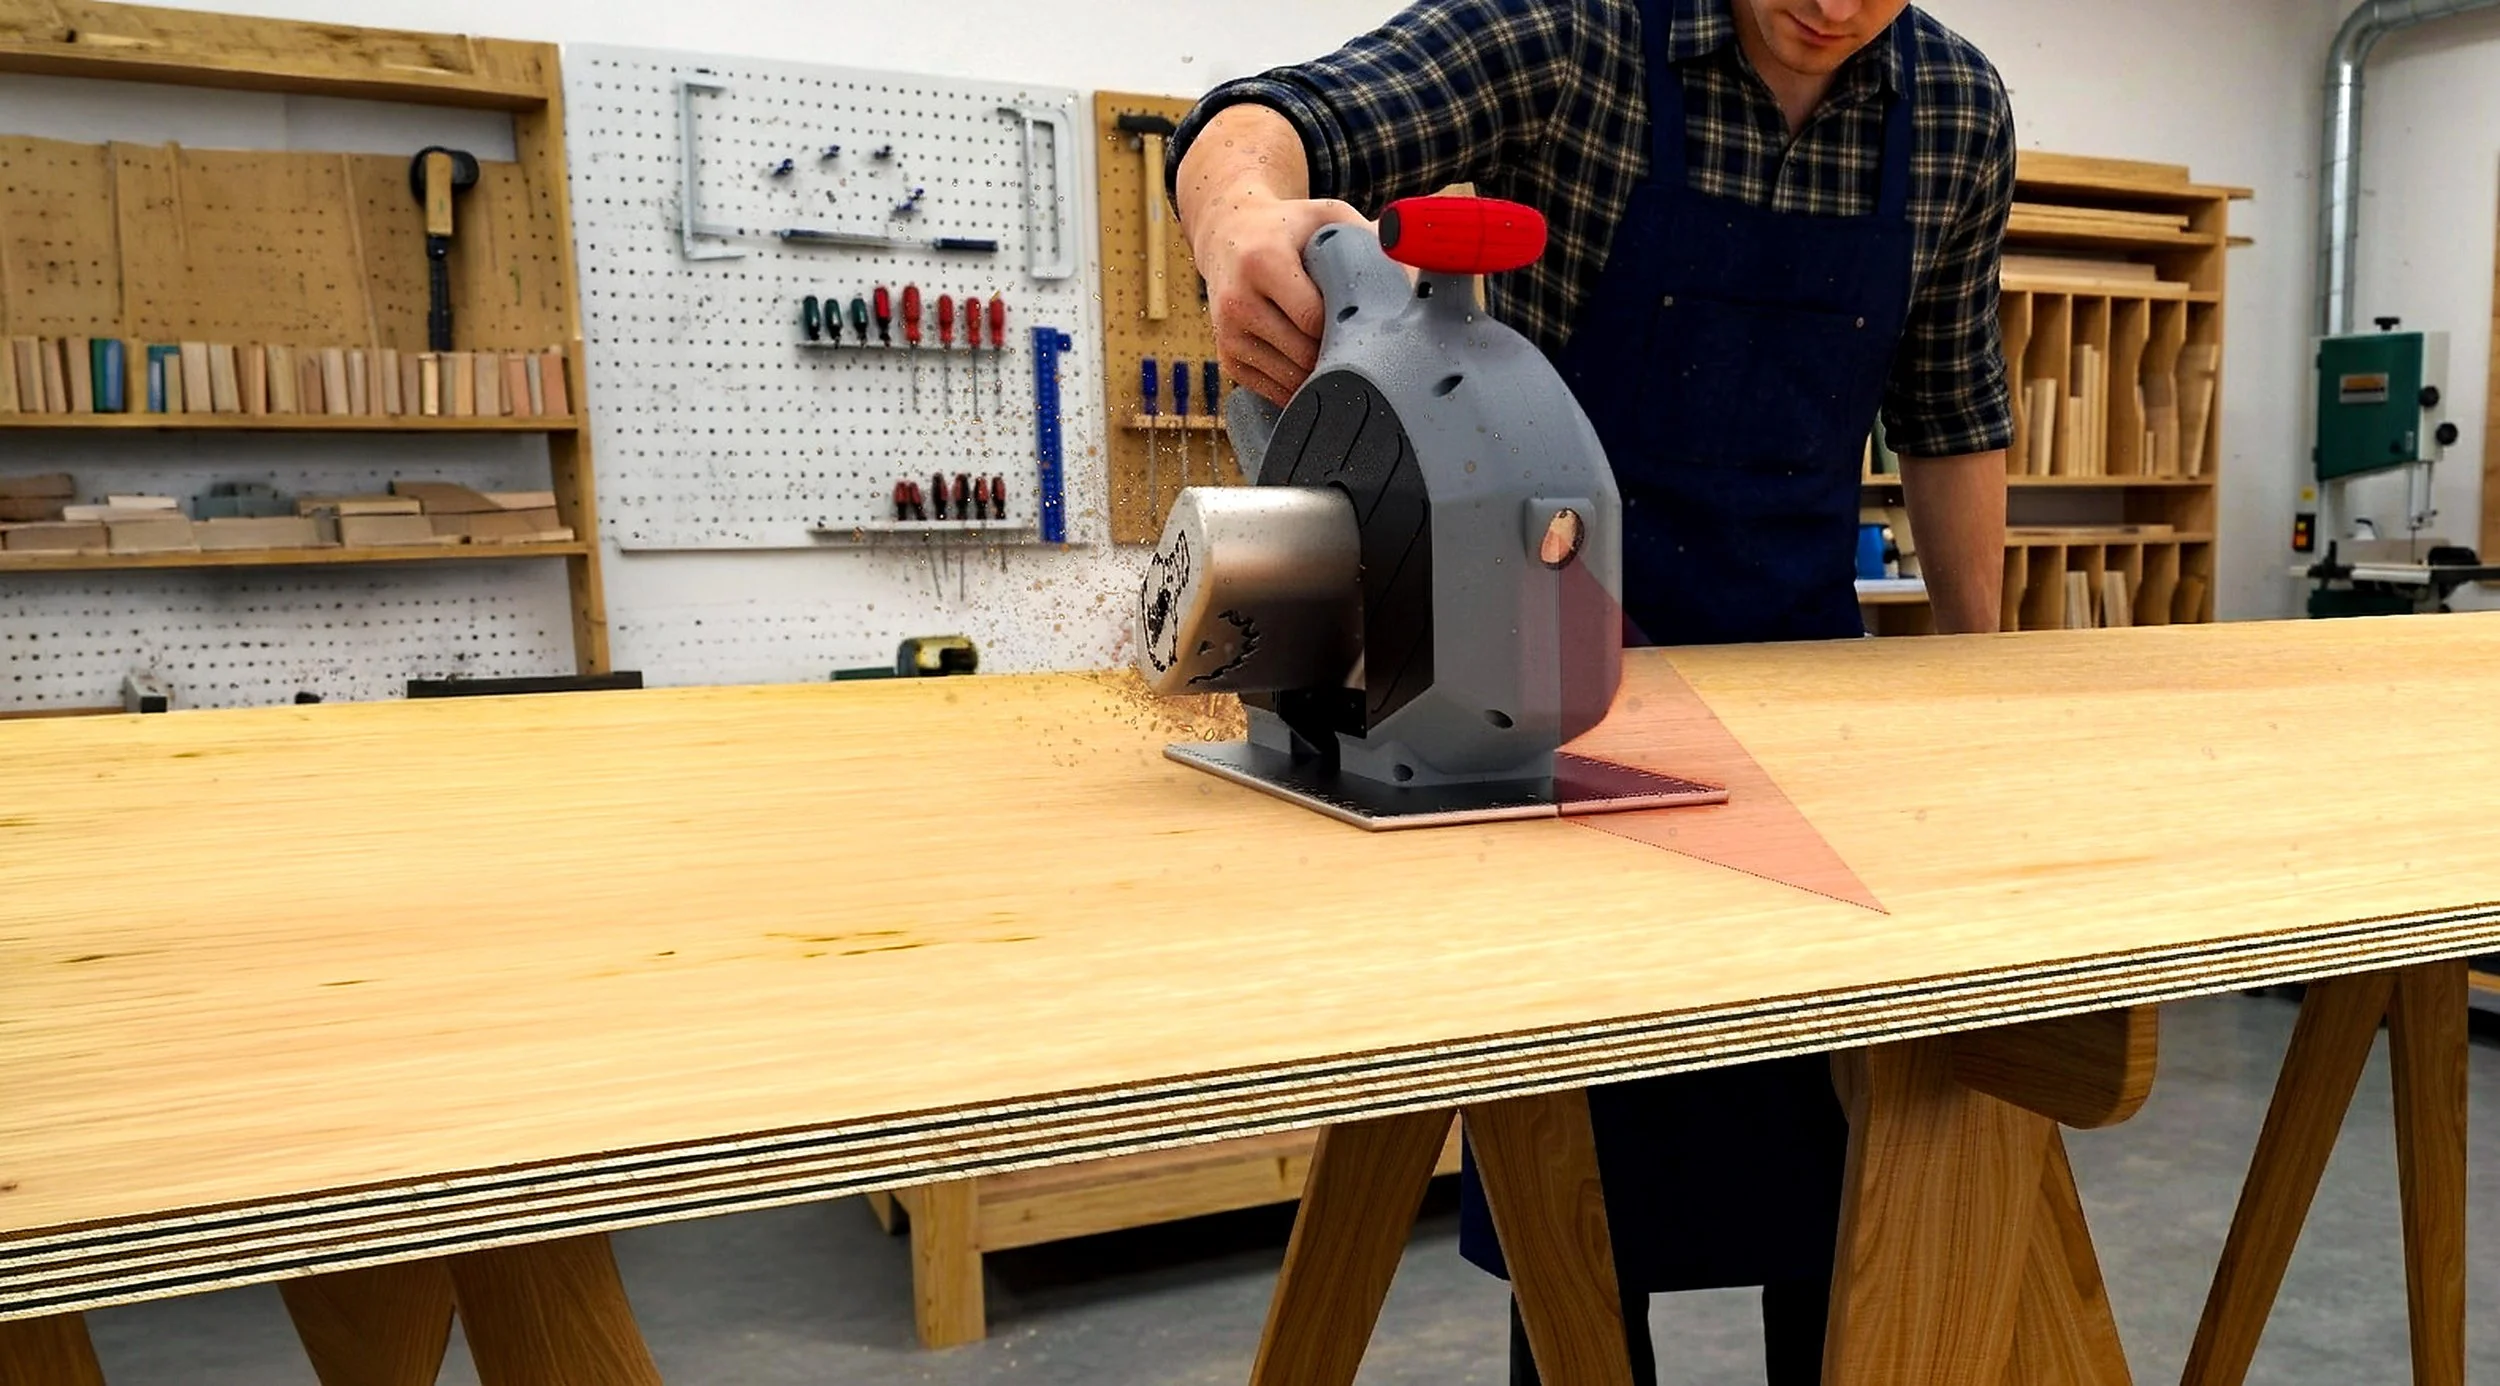
Chess piece bodies were spun on the lathe
I settled on laser-cut basswood for the toppers after researching possible methods for 3D and 2D shapes


MOLD MAKING


Early exploration with epoxy, mica powder, dye, molds, and melting solder; sticking with a space theme, I experimented with purples, blacks, and silver
MASTER COPIES


Creating a heat-resistant silicone mold that would shape my metal pieces, I settled on bismuth after researching my options

The most successful batch of toppers came from pouring epoxy into the basswood cutouts
The bodies were simpler and came out clean after one attempt using the silicone mold
CASTING EPOXY

CASTING BISMUTH


Jumping into unfamiliar territory, I melted the bismuth on the stove and poured it into the silicone molds
The result was perfect, leaving shiny chess piece bases and necks cast from pure metal
Final steps:
- drilling holes into each epoxy body
- assembling each four-component piece

FINAL CASTS
FINALS